How to Enable Custom Duration
Follow these steps:
1. Install and Activate the Addon
After purchasing, install and activate the Custom Duration addon.
Once activated, the addon will integrate directly into your BookingHub dashboard.
2. Edit Your Service or Package
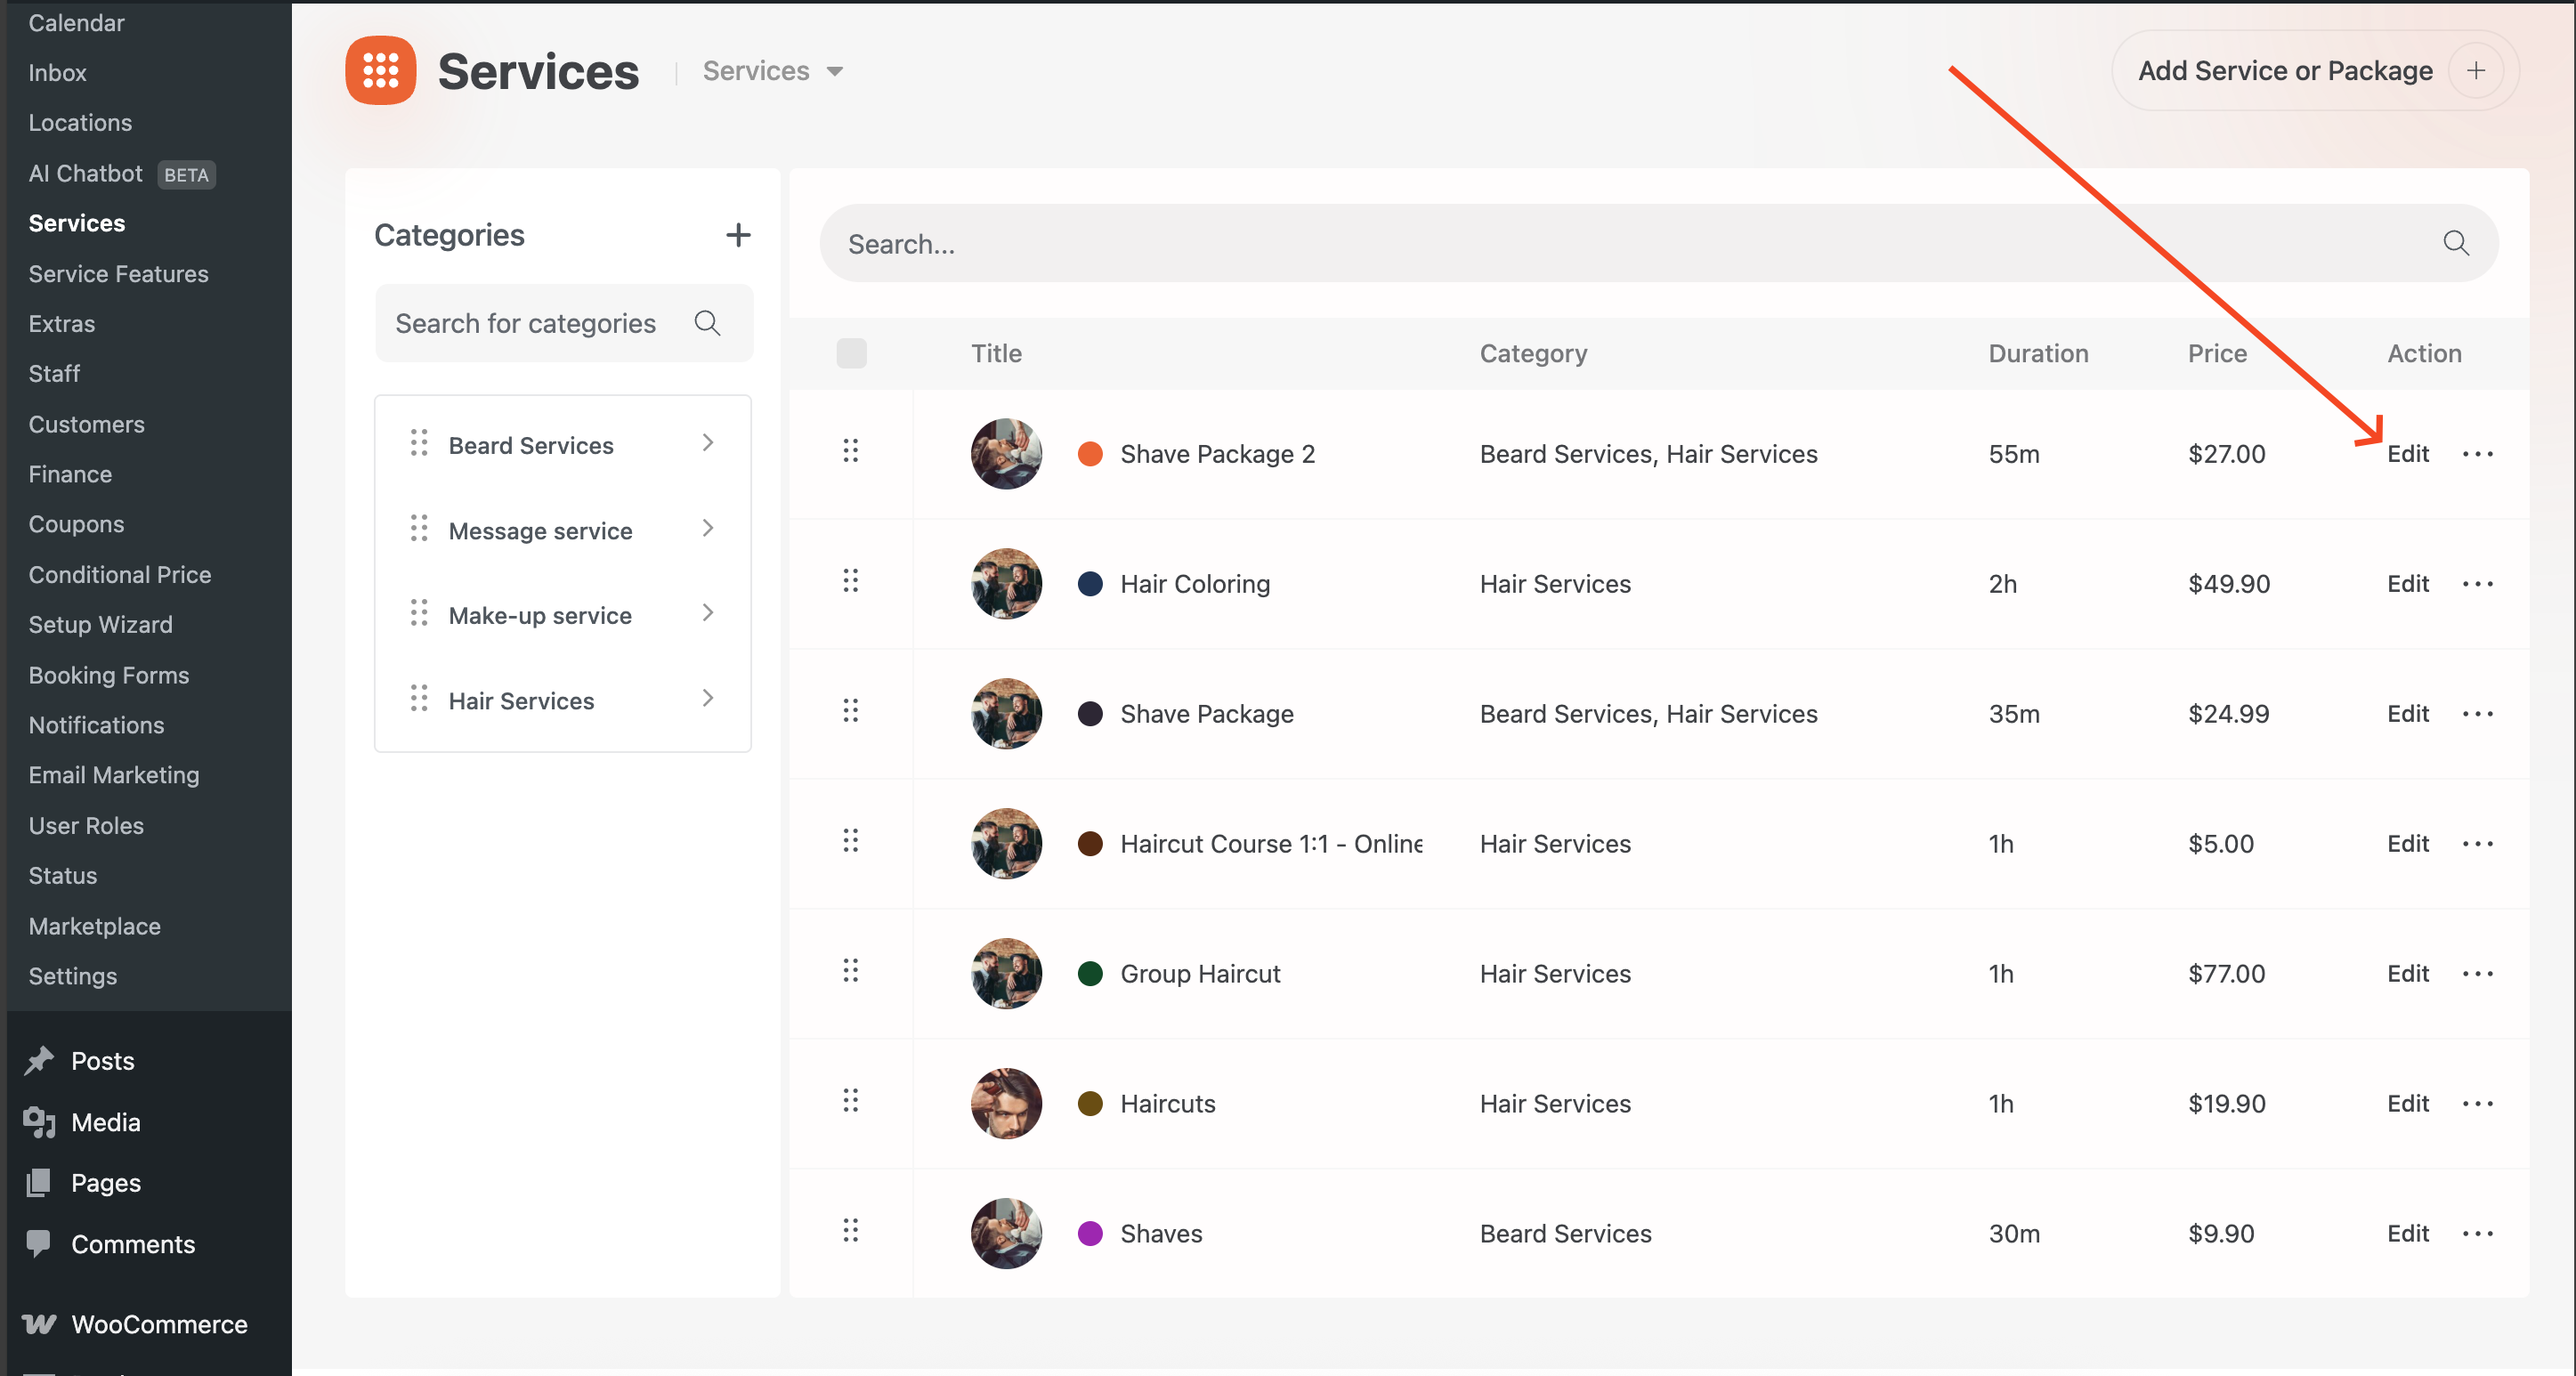
From your WordPress dashboard, go to BookingHub → Services.
Select the service or package you want to allow custom durations for.
Click Edit.
3. Enable Custom Duration
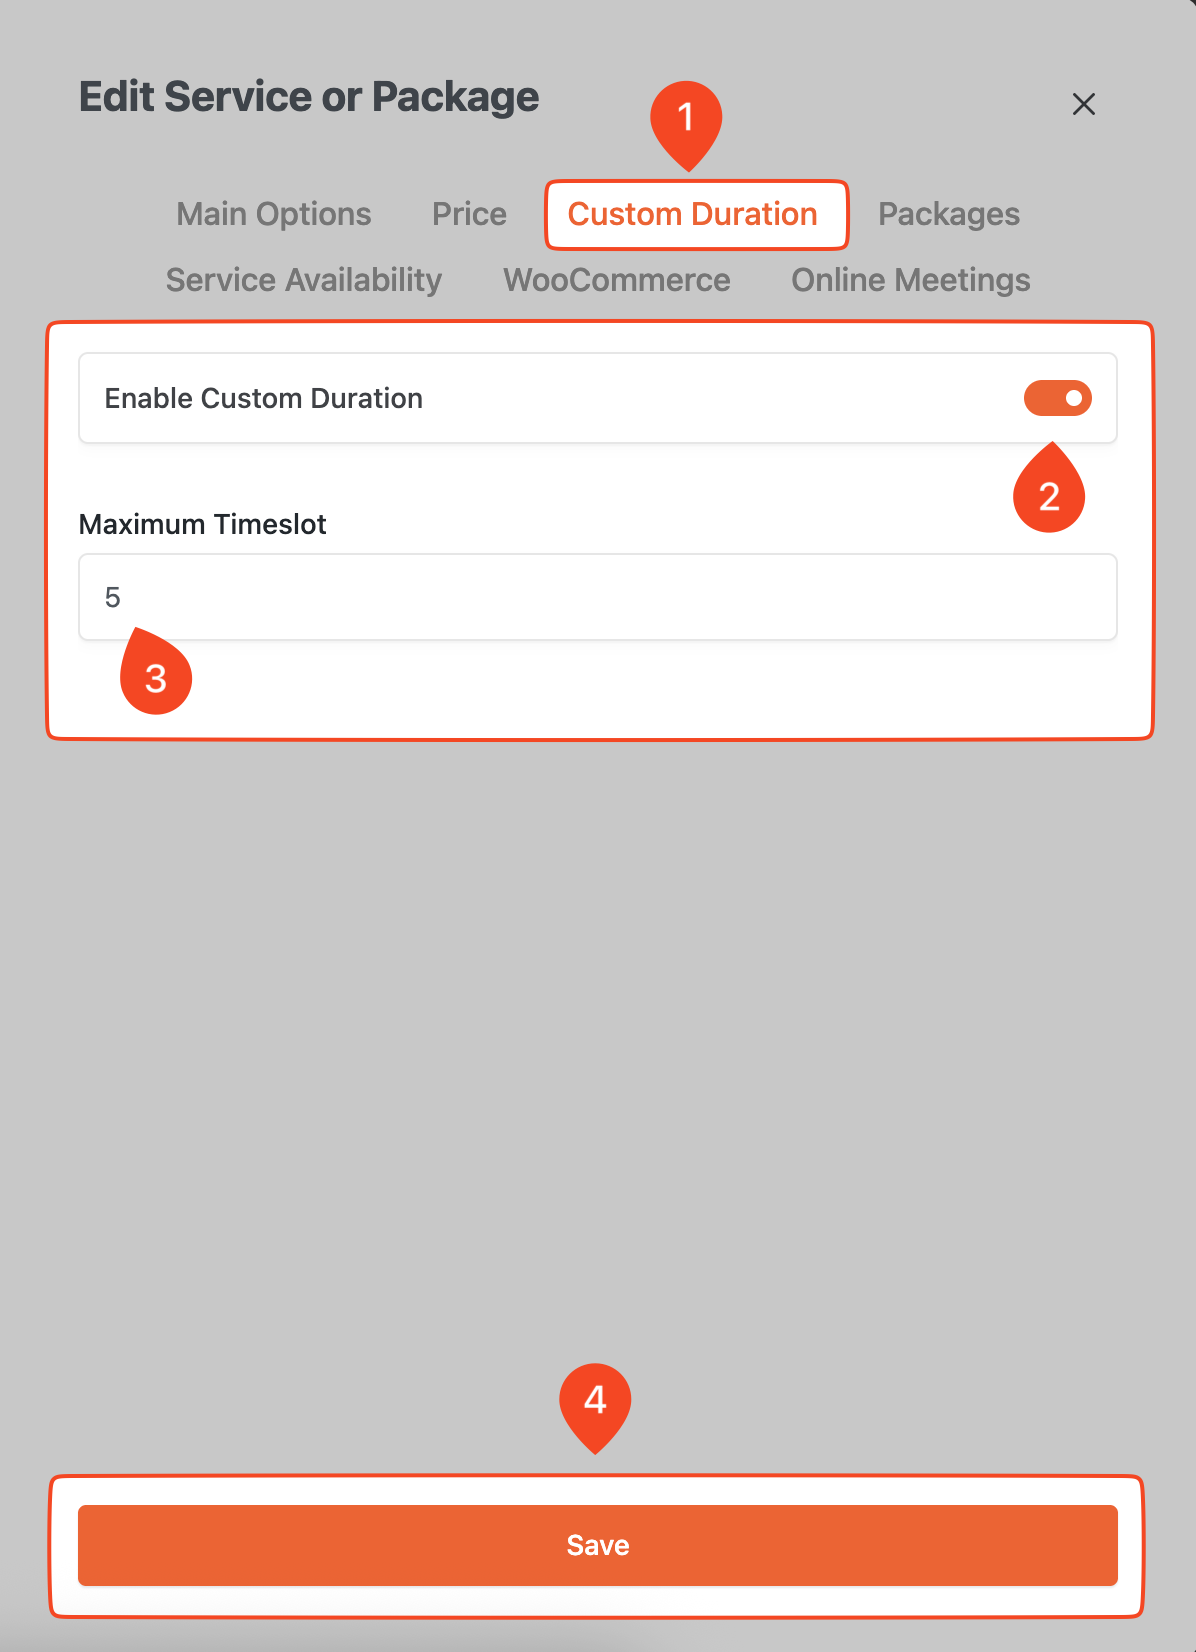
Open the Custom Duration tab.
Switch on the Enable Custom Duration toggle.
Set the allowed Maximum Timeslot value.
1 Timeslot = the default service time (example: 20 minutes).
2 Timeslots = double the service time (example: 40 minutes).
3 Timeslots = triple the service time (example: 60 minutes), and so on.
- Save your changes.
👉 Example: If your base service is 20 minutes and you set the maximum timeslot to 5, customers can book between 20 minutes and 100 minutes in increments of 20 minutes.
4. Adjust Your Booking Form Settings
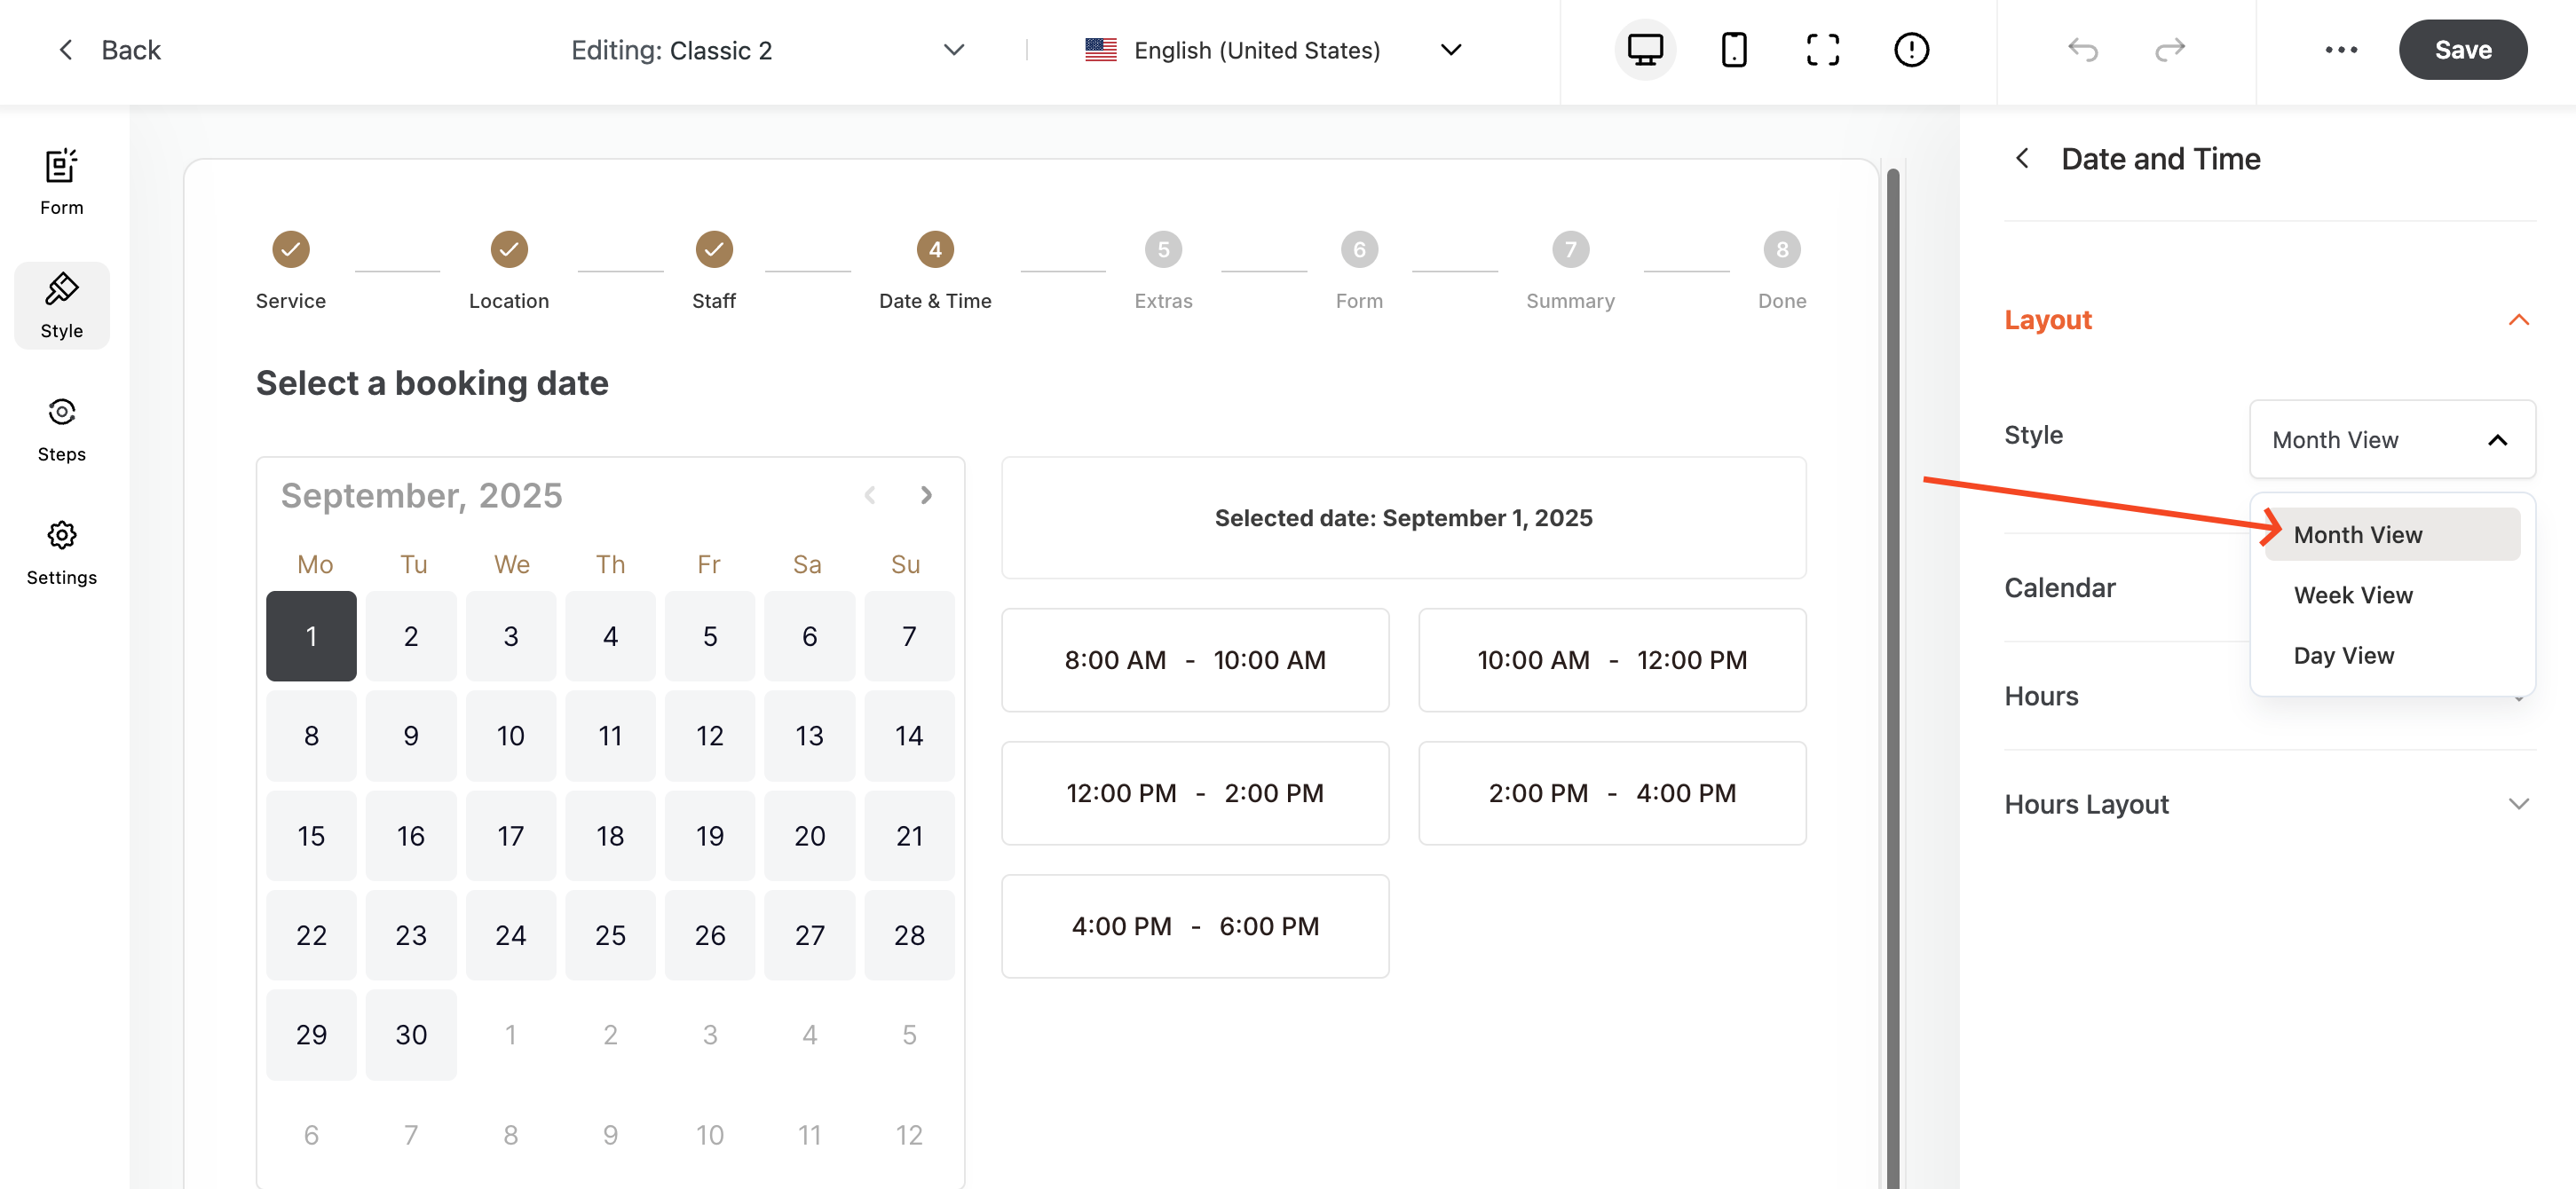
For the custom duration feature to display properly:
Go to your booking form editor.
Navigate to Style → Date and Time → Layout.
Set Style to Month View.
⚠️ Custom Duration will only work with the Month View style.
5. Test the Booking Form
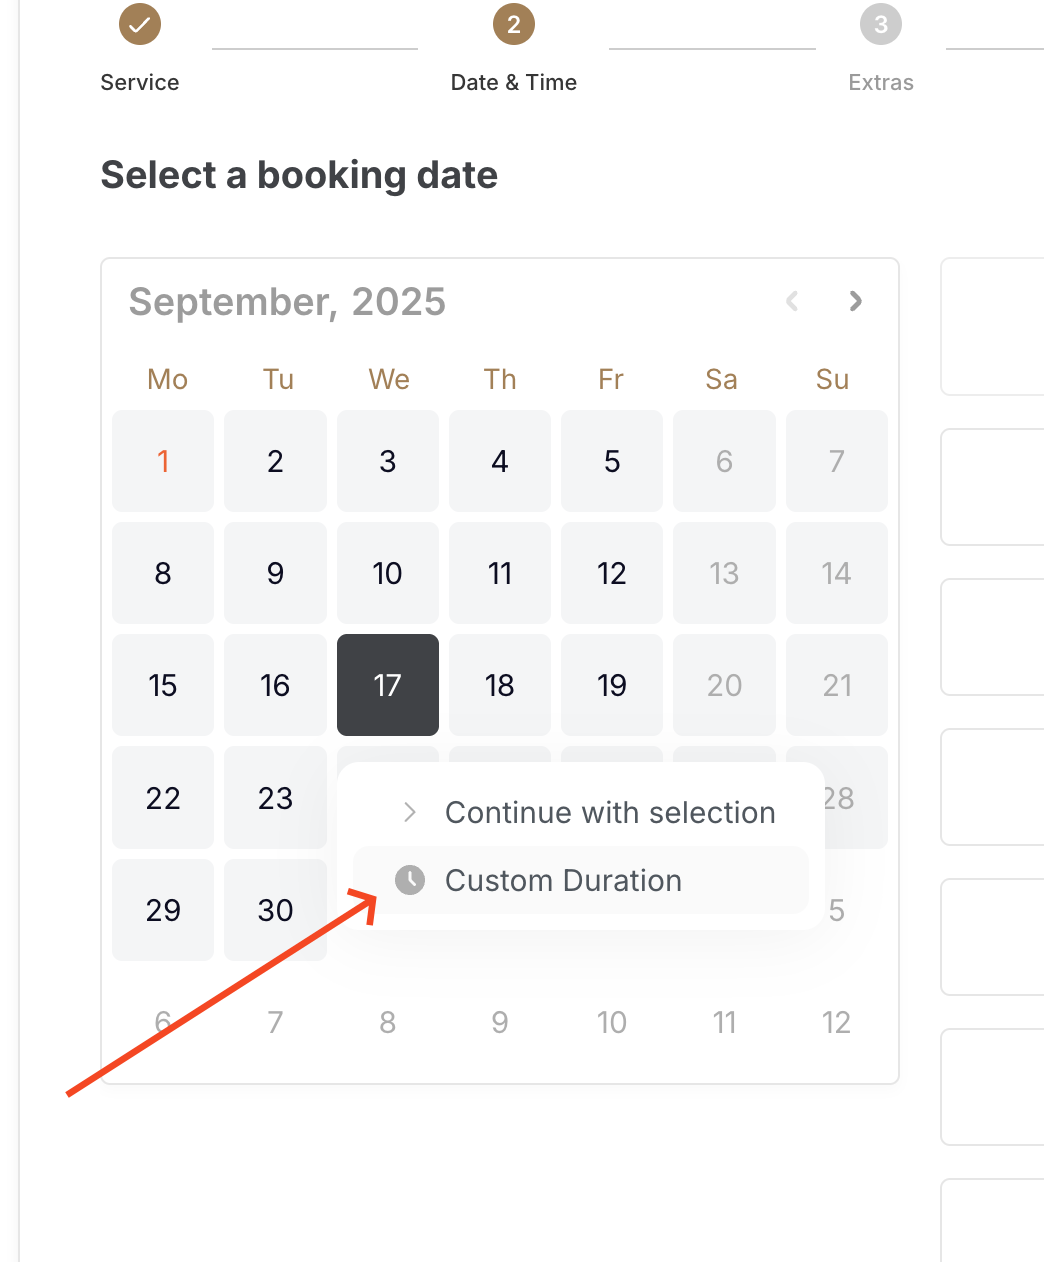
Open your booking form.
Select a date.
You should now see a Custom Duration dropdown under the selected date.
Customers can pick how many timeslots they want (e.g., 20m, 40m, 60m…).
✅ That’s it! You’ve successfully enabled Custom Duration. Your customers can now book longer or shorter services depending on their needs.