You can connect BookingHub with WooCommerce to leverage WooCommerce’s powerful payment gateways and checkout process. This allows you to accept payments for your bookings using WooCommerce-supported methods such as Stripe, PayPal, or direct bank transfer.
How It Works
Once you connect BookingHub to WooCommerce:
Create a Placeholder Product
You’ll need to create a placeholder product in WooCommerce. This is a required step. BookingHub uses this product as a shell to pass dynamic booking details such as service name and price to the WooCommerce cart.Enable WooCommerce Payment in BookingHub
Navigate to BookingHub > Payment Settings and enable the WooCommerce payment method. Once enabled, BookingHub will handle everything else automatically.Dynamic Name and Price
The name and price of the placeholder product will automatically update depending on the selected service in the booking form. So, while the product is static in WooCommerce, the data displayed during checkout is dynamic and pulled from BookingHub.
How the Cart and Checkout Work
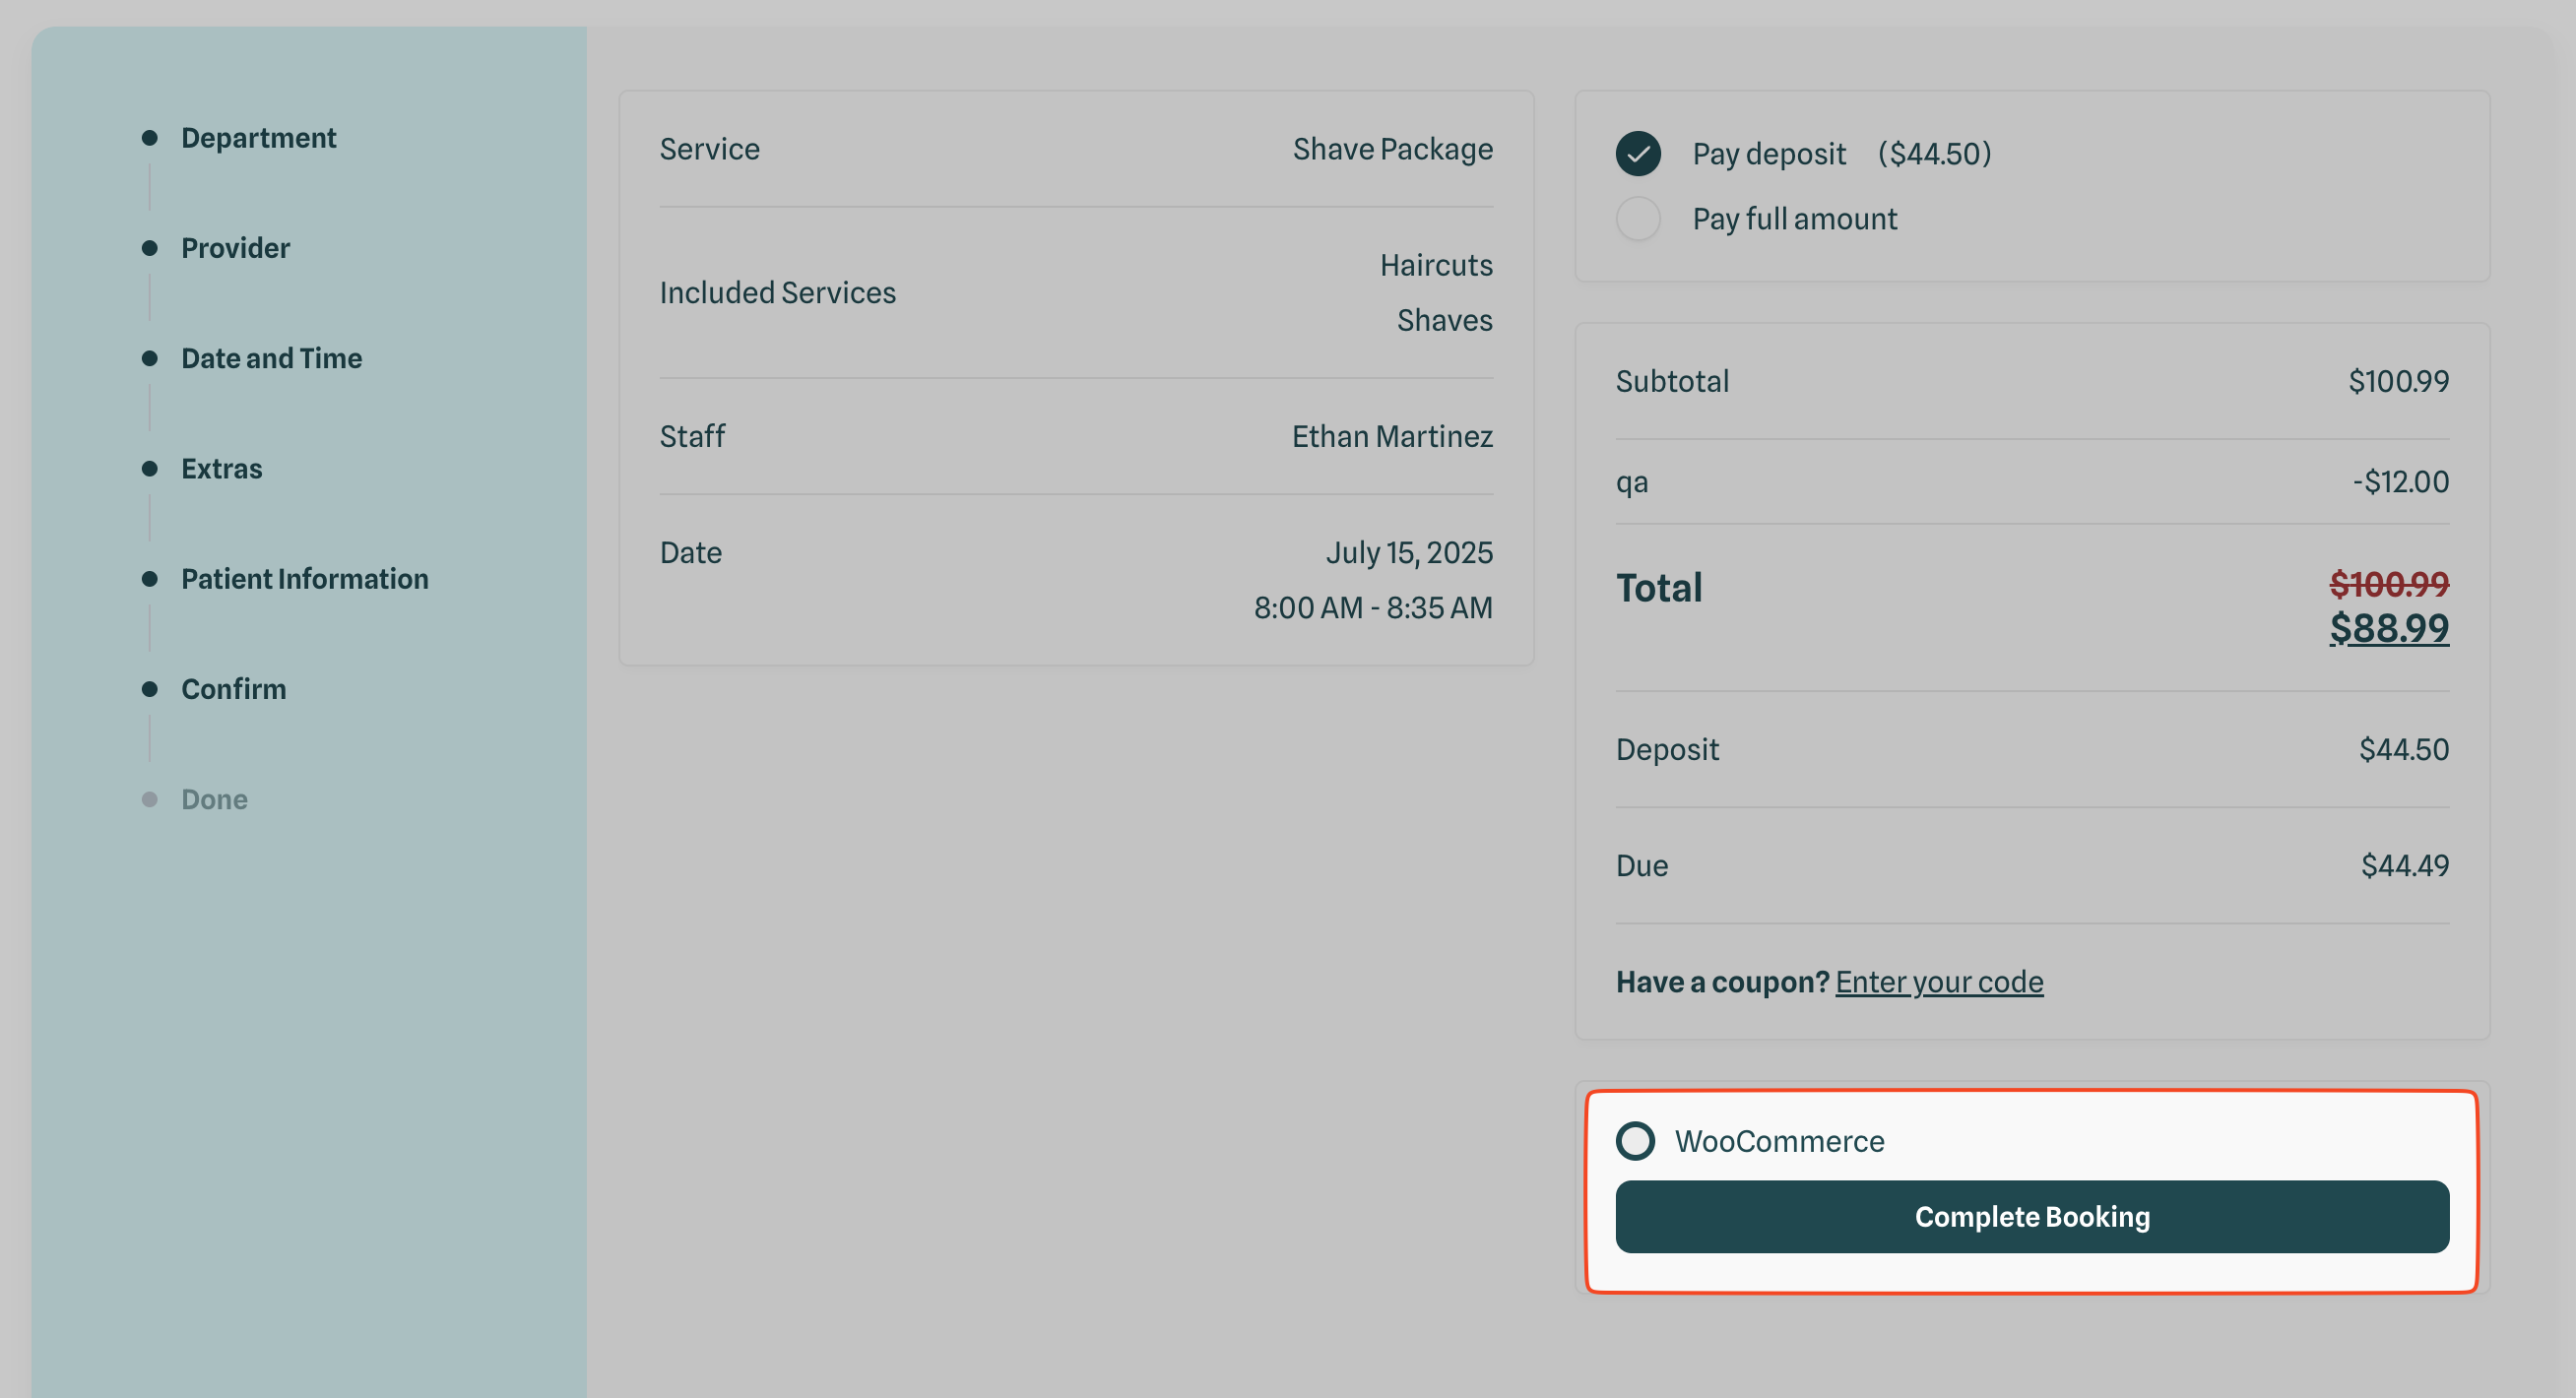
When a user completes a booking and chooses WooCommerce as the payment method, the dynamically-generated product is added to their WooCommerce cart.
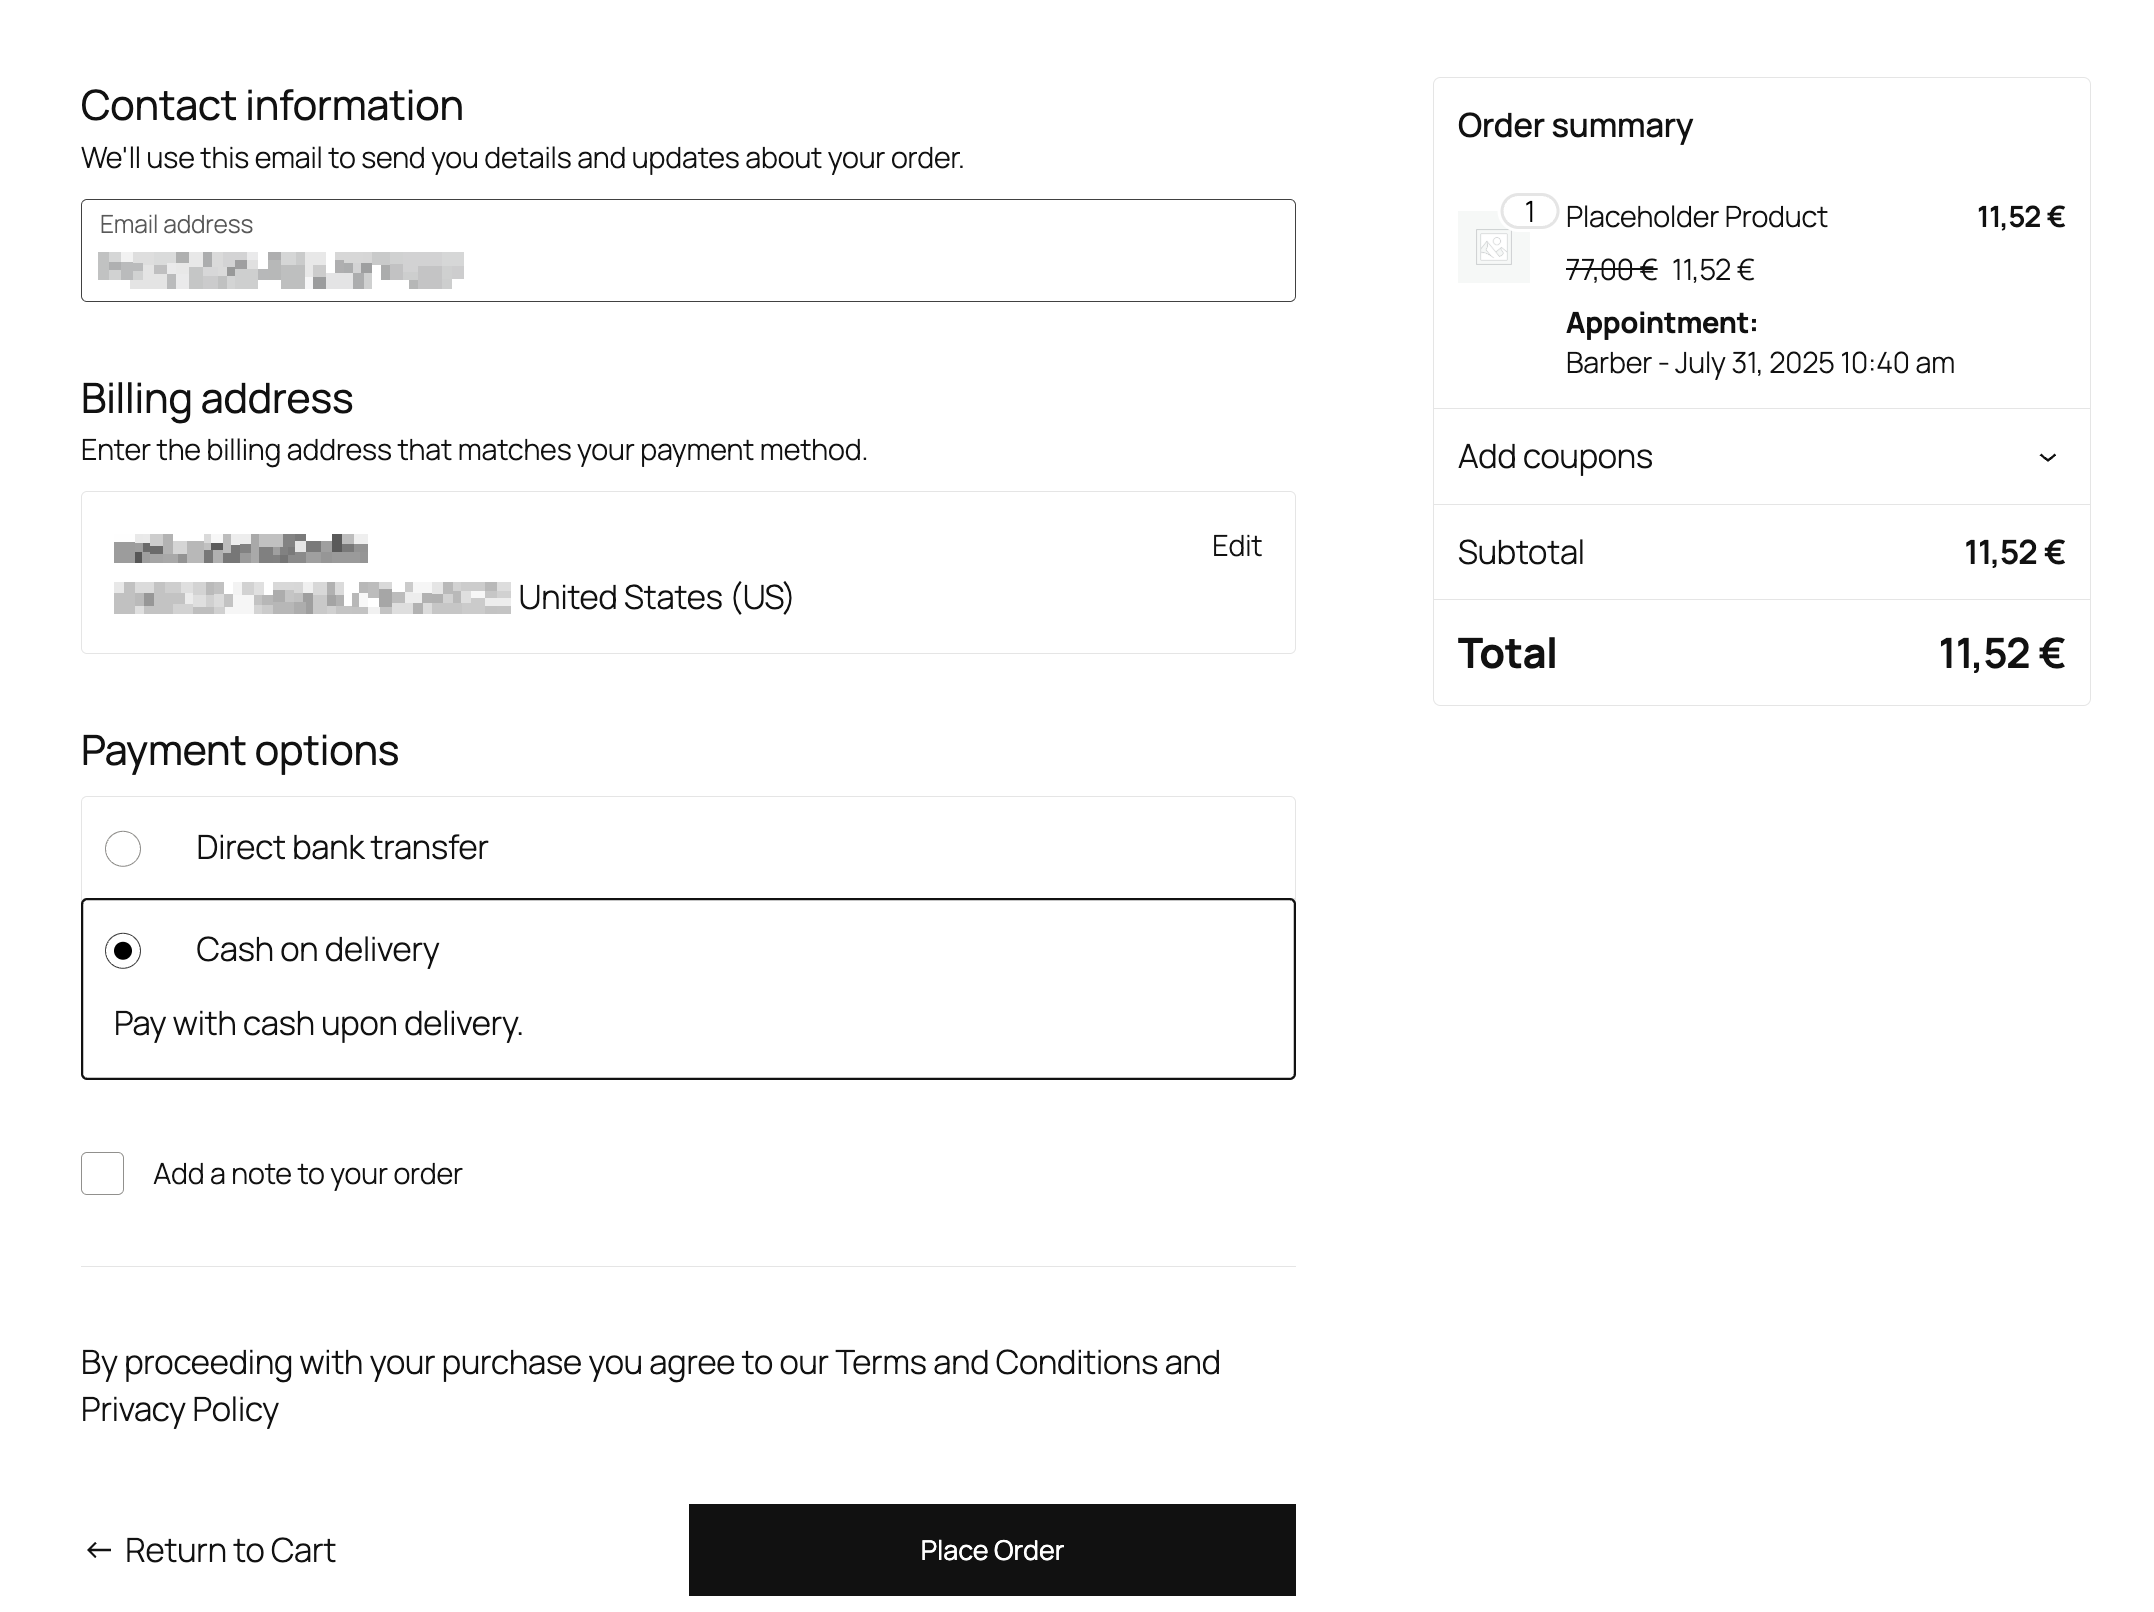
Users will then proceed through the WooCommerce checkout flow, where they can enter their billing details and complete payment.
To avoid confusion and prevent multiple bookings from being processed simultaneously:
Only one BookingHub item can be added to the cart at a time.
The quantity selector is disabled for the placeholder product in the cart.
This ensures each checkout is tied to one unique service appointment.
Tax Handling
Taxes in WooCommerce and BookingHub are handled differently:
BookingHub calculates the total price including taxes if you’ve set taxes in the BookingHub pricing settings.
In the WooCommerce checkout, this total amount (including taxes) is passed as the product price.
However, WooCommerce will not display taxes separately if they’re already included by BookingHub; it will simply show the total price.
If you also configure taxes in WooCommerce, they will be added on top of the total passed from BookingHub, leading to a double tax situation.
Recommendation for Tax Configuration
You should choose one of the following tax methods:
Use BookingHub’s internal tax handling, and disable WooCommerce tax calculation, or
Use WooCommerce’s tax system exclusively, and exclude tax settings in BookingHub.
Avoid using both simultaneously to prevent incorrect totals or tax duplication.
Step-by-Step Integration Guide:
1. Install and Activate the WooCommerce Plugin
Before you begin, ensure that the WooCommerce plugin is installed and activated on your WordPress website.
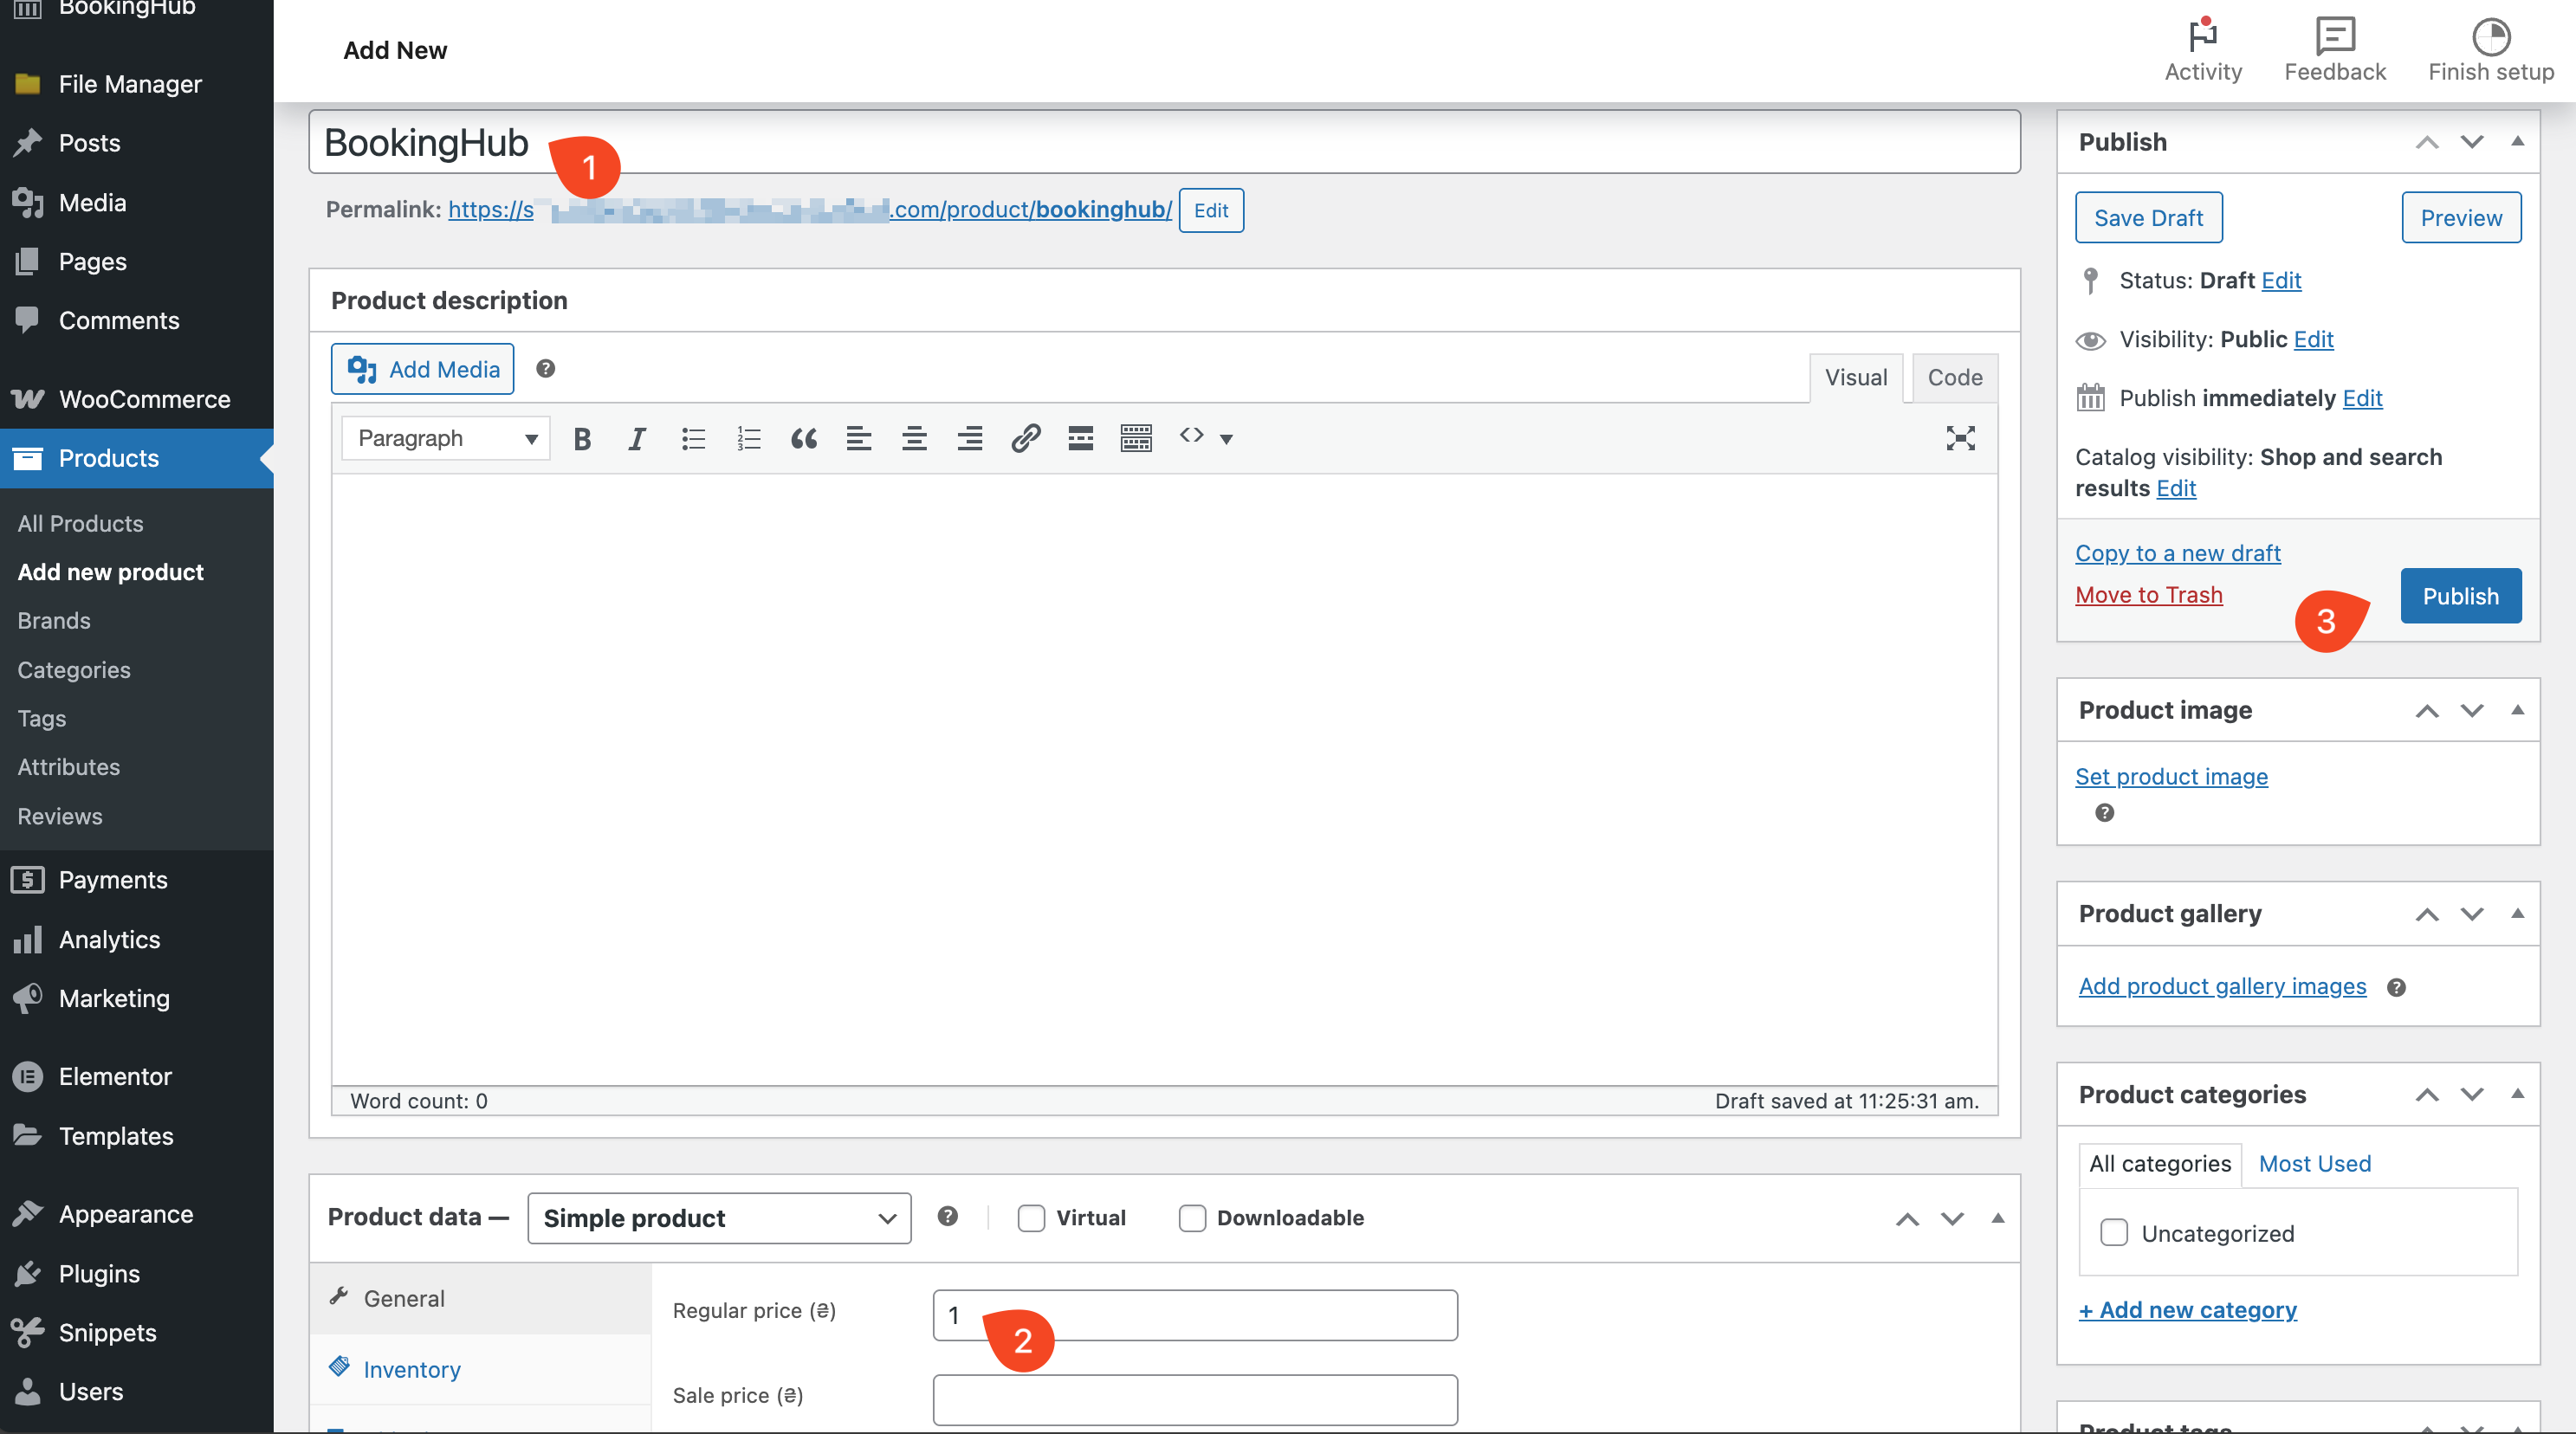
2. Create a Placeholder Product in WooCommerce
BookingHub dynamically adjusts product details, so you’ll start by creating a simple placeholder product in WooCommerce.
From your WordPress dashboard, navigate to WooCommerce > Products.
Click on “Add New”.

Give the product a temporary name (e.g., “BookingHub Service”).
Set a temporary regular price for the product.
Click the “Publish” button to make the product live.
3. Enable WooCommerce Integration in BookingHub Settings
Now, activate the WooCommerce integration within your BookingHub settings.
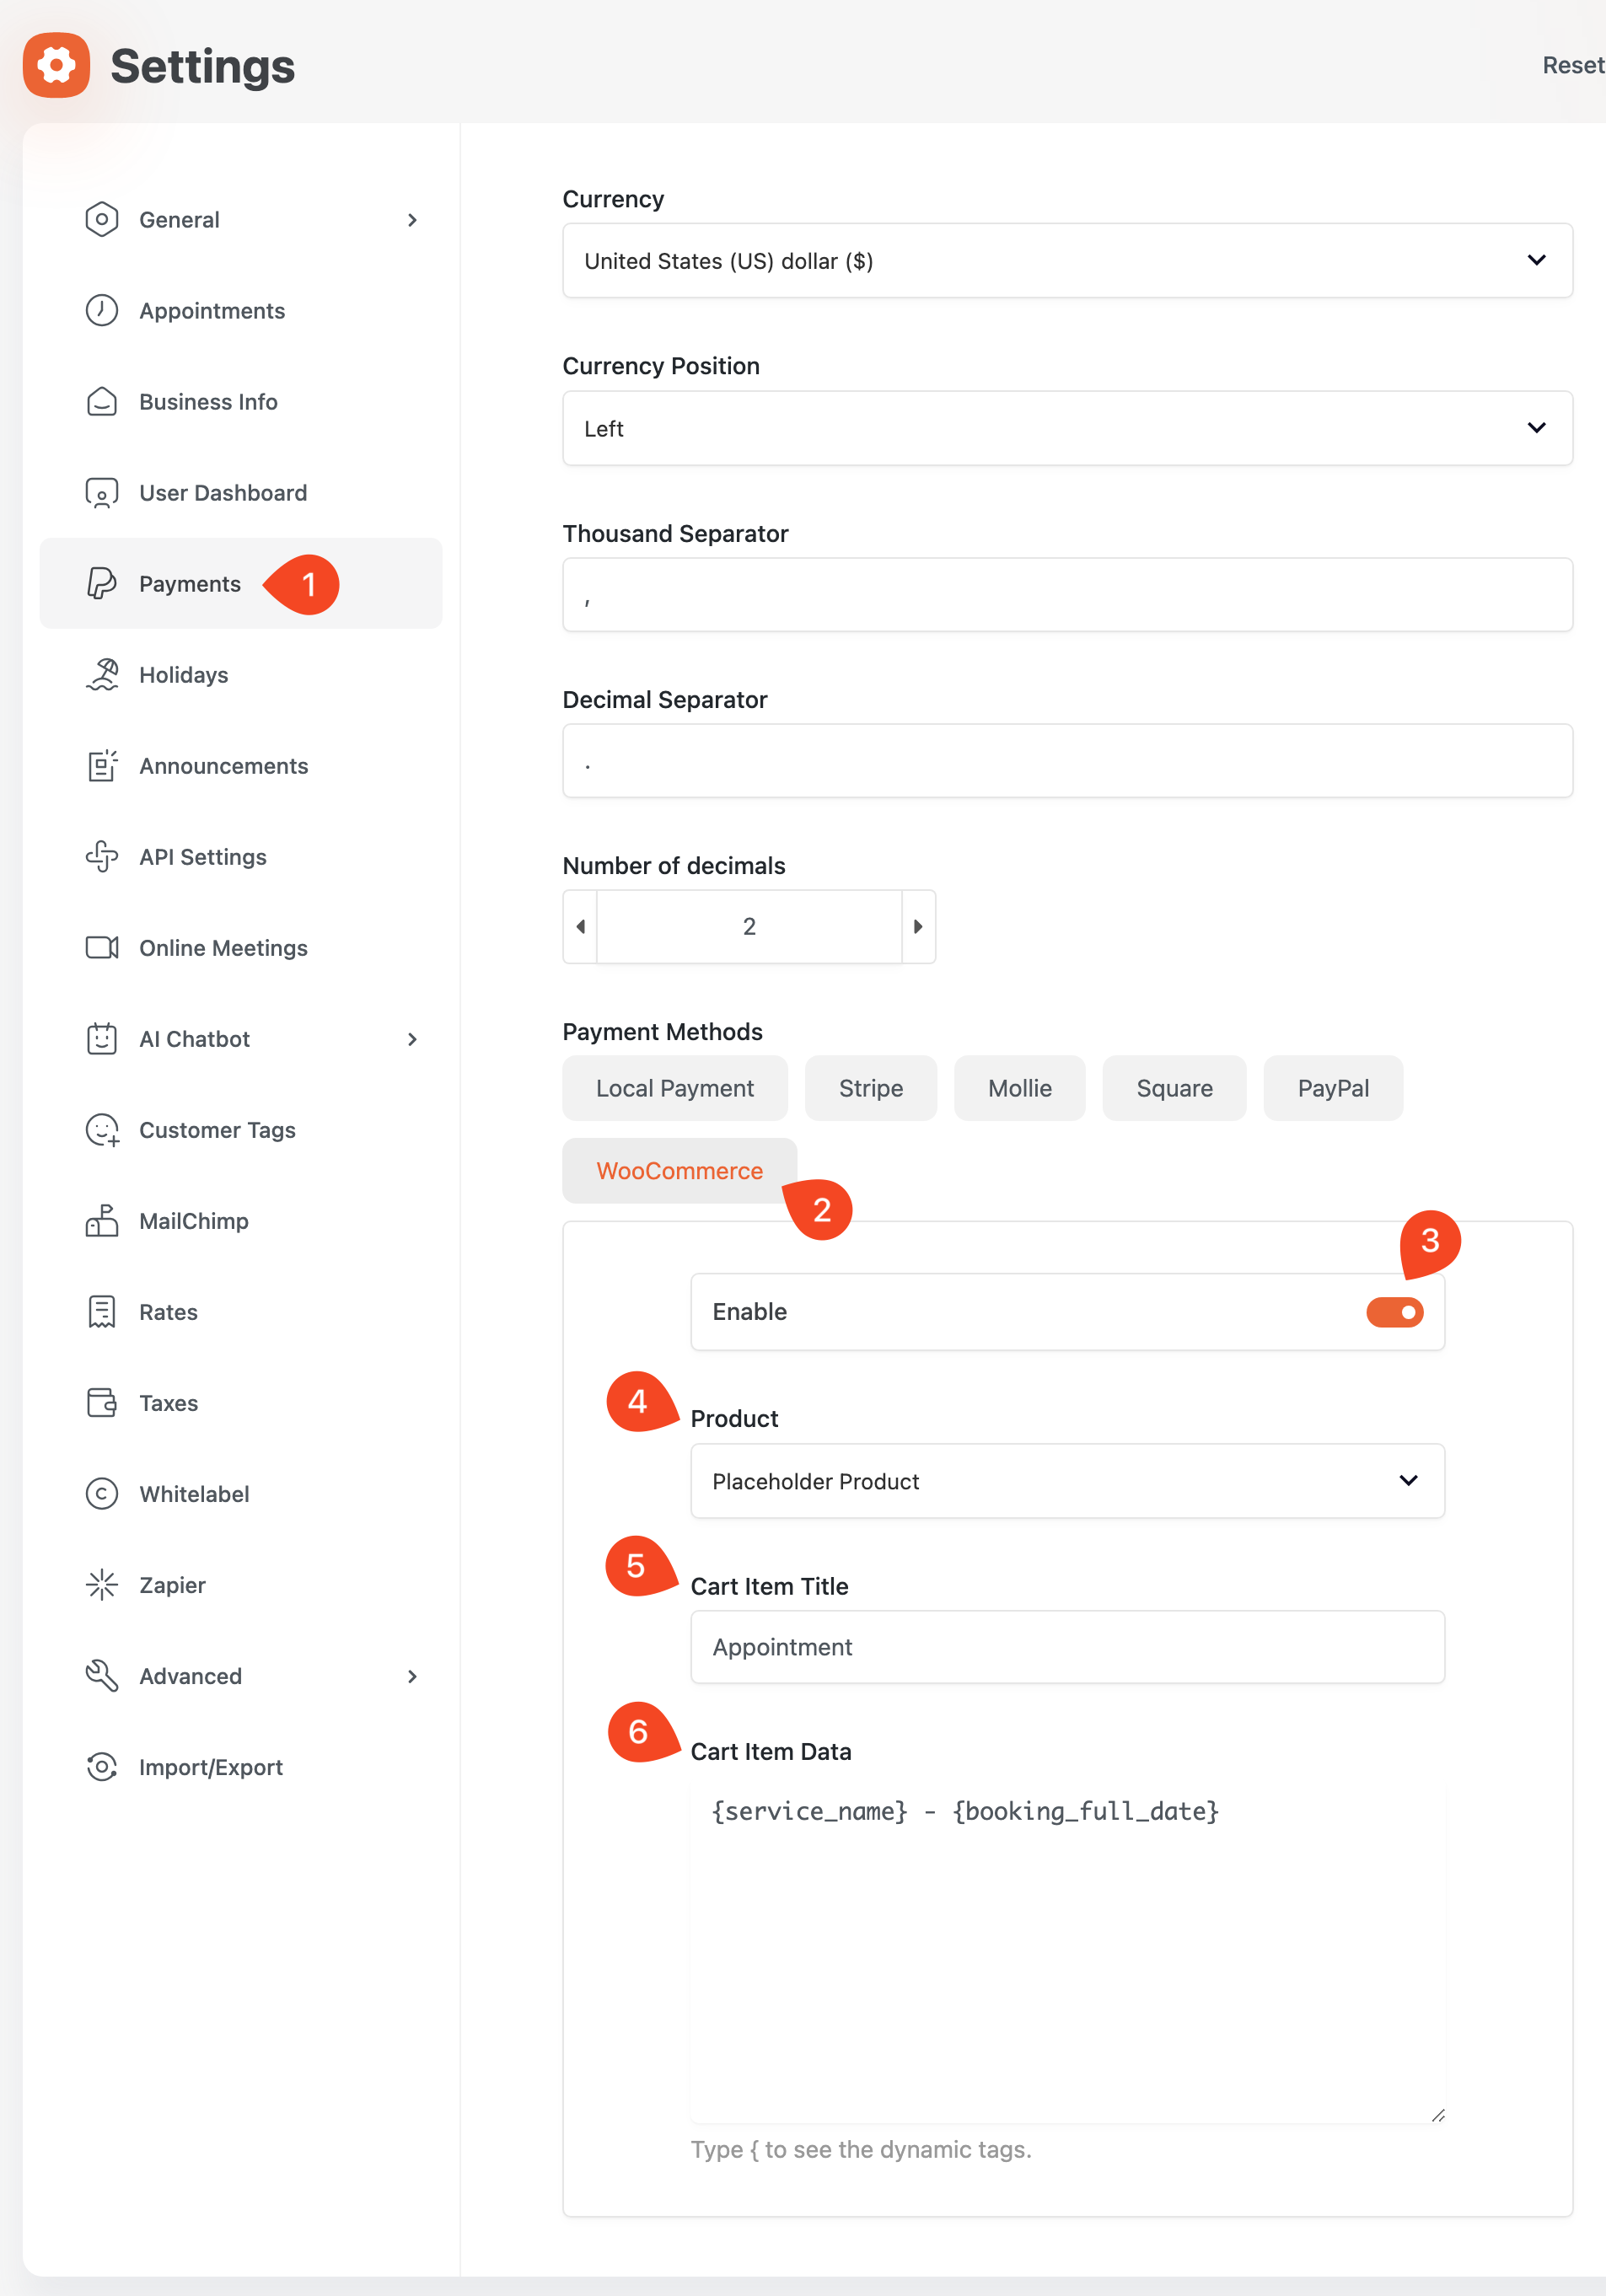
Go to BookingHub Settings > Payments.
- From the Payment Methods section, click WooCommerce.
Locate the “Enable WooCommerce Payment” toggle and switch it to “ON”.
- Select the placeholder product you created in Step 2.
- In the “Cart Item Title” field, enter a concise title. This will appear at the beginning of the booking’s title in the WooCommerce cart.
- Use the “Cart Item Data” field to add detailed information that will be displayed beneath the booking in the WooCommerce cart.
- This field supports dynamic tags, allowing you to automatically include booking-specific details (e.g.,
{service_name},{booking_full_date}).
- This field supports dynamic tags, allowing you to automatically include booking-specific details (e.g.,
- After configuring all the settings, click the “Save Changes” button to apply your modifications.
4. Test the Integration
To confirm everything is working correctly, create a new booking through your BookingHub system.
Upon reaching the summary step of your booking form, you should be automatically redirected to the WooCommerce checkout page to proceed with payment.


Summary
By integrating WooCommerce with BookingHub, you can:
Offer customers familiar and trusted payment methods.
Leverage WooCommerce’s checkout experience.
Dynamically pass booking data from BookingHub to WooCommerce.
Maintain control over how taxes are applied and displayed.
Ensure streamlined one-service-per-checkout behavior for clarity and consistency.